Step-by-Step: Creating Multi-Layered CNC Sign Files
CNC professionals and sign makers know that precision and efficiency are the cornerstones of successful sign production. Multi-layered CNC files streamline the process, enabling smoother milling and painting. This blog dives into the steps of creating layered files, explores the advantages of Aspire and STL formats, and provides expert insights on material thickness and design optimization.
By the end of this guide, you’ll have the tools and knowledge to produce stunning 3D signs while maximizing efficiency and minimizing errors.
Why Use Multi-Layered CNC Sign Files?
Multi-layered CNC files separate design elements into distinct layers for easier milling, painting, and assembly. They offer:
Enhanced Control: Modify layers individually for cleaner cuts and precise results.
Painting Ease: Apply paint to isolated sections without overlap.
Custom Flexibility: Adjust designs to suit specific materials and client needs.
While STL files are invaluable for creating baked, solid models, Aspire files elevate the process by allowing adjustments to individual layers. Crave also provides options for customers who don’t use Aspire by separating layers into multiple STL files for seamless milling.
Step-by-Step Guide to Creating Multi-Layered CNC Files
1. Understand Your Material Thickness
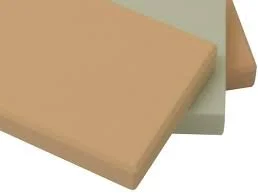
HDU is a versatile and commonly used material for CNC signage, available in thicknesses such as:
½ inch
¾ inch
1 inch
1.5 inches
2 inches
Most sign backgrounds, including borders and textures, can be milled from 1.5-inch or 2-inch thick HDU. For separate pieces such as letters, logos, or panels, use ½-inch to 1-inch thick HDU with a 2D milling process.
Pro Tip: For added durability, back your entire sign with ¾-inch plywood to provide a sturdy surface for attaching cleats and brackets.
2. Start with a Clear Design Concept
Define your sign’s purpose and structure. Whether it’s a prismatic lettering design, textured background panel, or multi-layered logo, outlining your goals upfront ensures a smoother workflow.
3. Use High-Resolution Design Software
Design in Aspire for full layer control. Aspire enables seamless separation of design elements like textures, lettering, and logos into distinct layers, allowing precise management.
Tip: Always design in high resolution to avoid jagged edges during milling.
4. Separate the Design into Layers
Break your design into logical layers:
Backgrounds and Borders: These can be cut from thicker HDU sheets.
Letters and Logos: Use thinner HDU sheets for individual elements.
Textures: Apply custom 3D textures to backgrounds or logos for added dimension.
For customers not using Aspire, Crave provides the same results by exporting multiple STL files with each layer separated for individual milling.
5. Optimize Milling Files
When designing multi-layered files, ensure each layer is optimized for your specific CNC router and chosen materials. Aspire files allow adjustments for tool paths, while STL files ensure compatibility across machines.
The Benefits of Aspire and STL Files
Aspire files and STL files complement each other in CNC workflows:
Aspire Files: Provide full layer control and flexibility for detailed projects.
STL Files: Offer a universal format for baked models.
By combining these formats, Crave ensures our customers have the tools needed to achieve the best results for their projects.
Why Material and Design Expertise Matter
At Crave, we understand the nuances of CNC sign making because we’ve been on both sides of the process: designing and creating. Our experience allows us to craft CNC files that:
Optimize milling for fast, smooth cuts.
Account for paint-friendly steps in the design.
Use high-resolution software to capture intricate details.
When you work with Crave, you’re not just hiring designers; you’re partnering with industry experts who provide guidance and support to improve your craft.
FAQs: Multi-Layered CNC Files
1. What thickness of HDU should I use for my sign?
For backgrounds and borders, 1.5-inch to 2-inch HDU works well. For letters and logos, ½-inch to 1-inch HDU is ideal.
2. Why should I back my HDU sign with plywood?
Backing HDU with ¾-inch plywood adds durability and provides a secure surface for mounting hardware.
3. Can Crave create multi-layered files if I don’t use Aspire?
Yes! We provide multiple STL files with each layer separated for easy milling.
4. Can Crave add textures to my existing design?
Absolutely. We can apply 3D textures to your design or create a custom shape with texture.
5. What makes Crave’s files unique?
We combine expert design skills with years of sign-making experience, delivering files optimized for smooth milling, easy painting, and flawless results.
Call to Action
Ready to create multi-layered CNC sign files that elevate your projects? Contact us for custom designs or explore our high-quality STL and Aspire files. Visit our website today to take your sign-making craft to the next level!


